 Customization
Table of contents
Customization folder
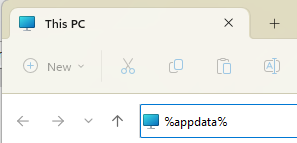
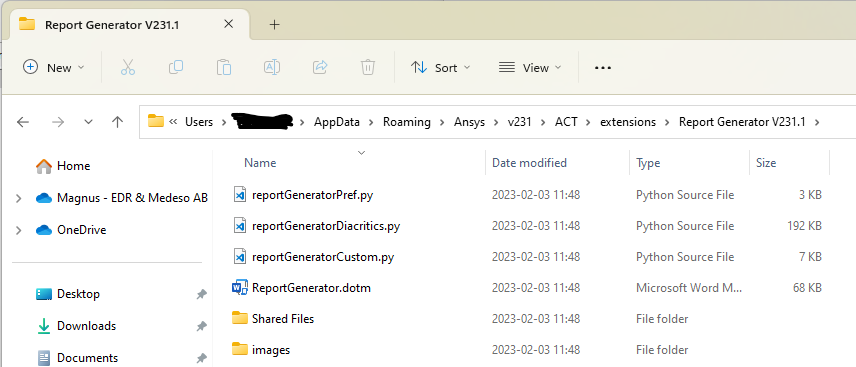
Report Generator can be customized in a number of ways. The files that can be modified by the user are described in the following sections. The files are located in the app installation folder. When an app is installed (WB>Extensions>Install Extension…) it is placed in the user profile and can be located by typing “%appdata%” in the Explorer path and then navigate to the corresponding app folder, e.g. “/Ansys/v251/ACT/extensions/EDRMedeso Report Generator 2025R1.2/”.
“/Ansys/v251” <=> Ansys 2025R1).
 Maintenance of custom versions
The global version of Report Generator can be updated with the customization files for customer specific versions in addition to the Word template file.
Starting in 2026 R1 all settings are saved in the file reportGeneratorPref.json replacing the file reportGeneratorPref.py and the style settings defined in the file reportGeneratorDiacritics.py.
In a multi-user organization the app administrator installs the Report Generator app first and use Import report settings to update the settings file and copy all templates and related files and then share this app installation according to the instructions on page; “Multi-user deployment of apps - Network” in App and Licence Client Installation instructions.
Make sure to include any new preference options and Word VBA macros defined in the official version described in the following sections.
EDRMedeso can offer the service to create a customer specific version of the app and deliver the customization files to the customer in order to use it in current and future versions. Use “Contact Support” in the “Help” menu for more information or to request a quotation for customization.
 reportGeneratorPref.json
The global default report settings are defined in the file “reportGeneratorPref.json” and this file is used when adding the Report Settings object. This file contains settings for each Word template as well as Table Headline Colour, Font Style Settings and Table Style Settings.
Changes made in the Report Settings object can be saved back to the file without the need of manual editing the file itself.
The Colours, Fonts and Table Styles can be edited in General Settings.
Table Headerline Colour
The available colour names are defined in the “colourMap” dictionary. Colours that reverse text colours are defined in “reverseTextColourList”.

Font Style Settings
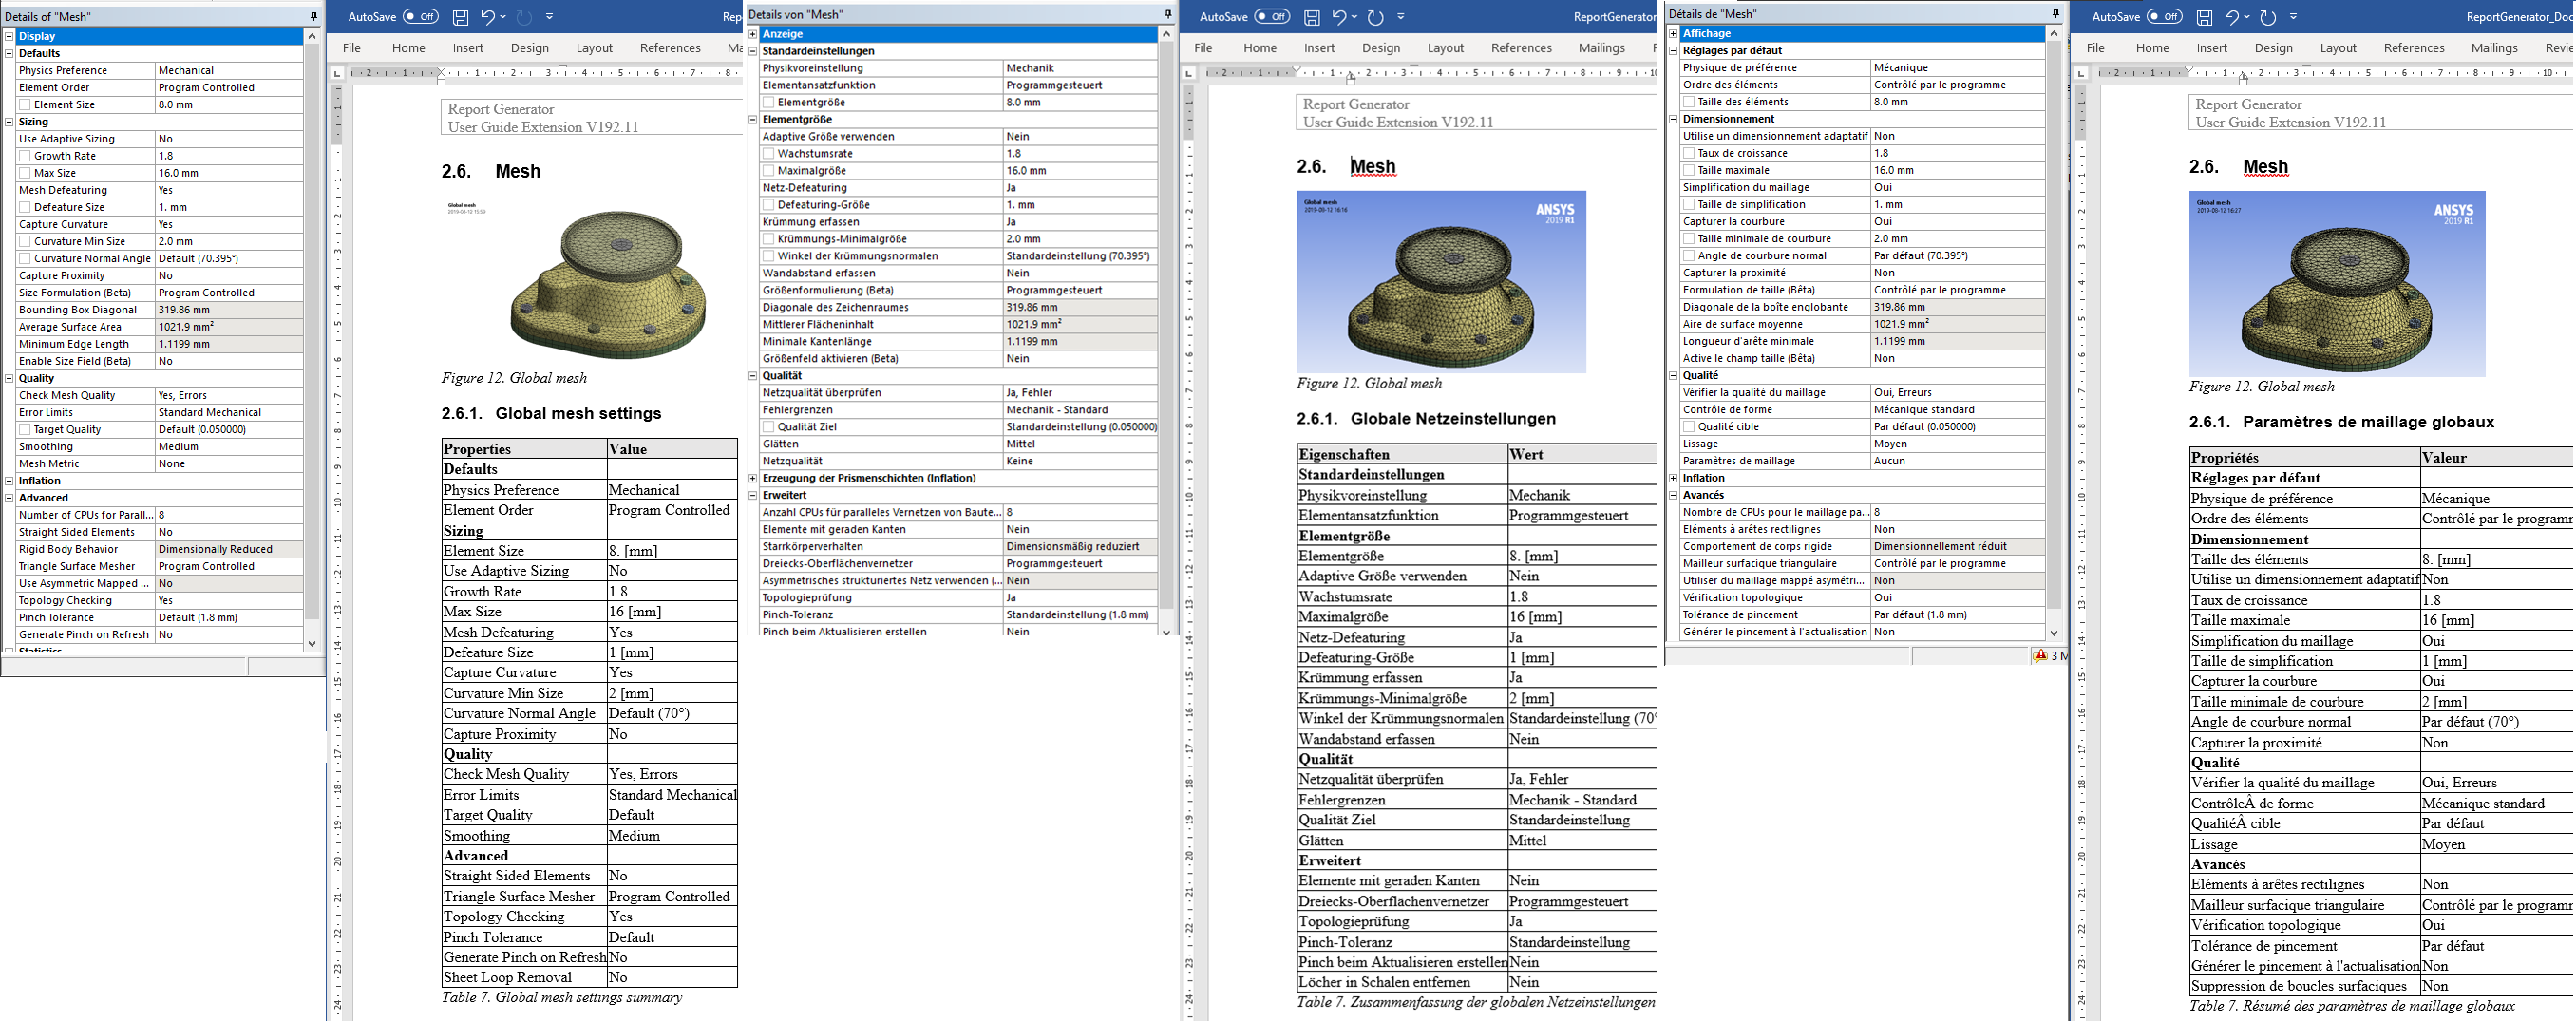
The available font names and sizes are defined in the “textFontDict” dictionary. The fonts are defined with the default language “EN-US”. If a different display language is used then the language in the report is updated to match, e.g. “lang=DE”.

Table Style Settings
Options for table line is defined by the “tableStyleDict” dictionary.

reportGeneratorPref.py (Legacy)
The global default report settings was defined in the file “reportGeneratorPref.py” until 2025 R2 and this file was used when adding the Report Settings object.
Changes made in the Report Settings object can be saved back to the file without the need of manual editing the file itself.
reportGeneratorDiacritics.py
The language support, special characters, html tags and custom text identifiers are defined in the file “reportGeneratorDiacritics.py”. This file can be edited by the user but any changes must be manually applied in new versions of the app. The colours, fonts and table styles are moved to reportGeneratorPref.json.
Format Comment
Conversion of text identifiers for text formatting and Greek letter replacement is managed by the dictionary “textFormatDict”.
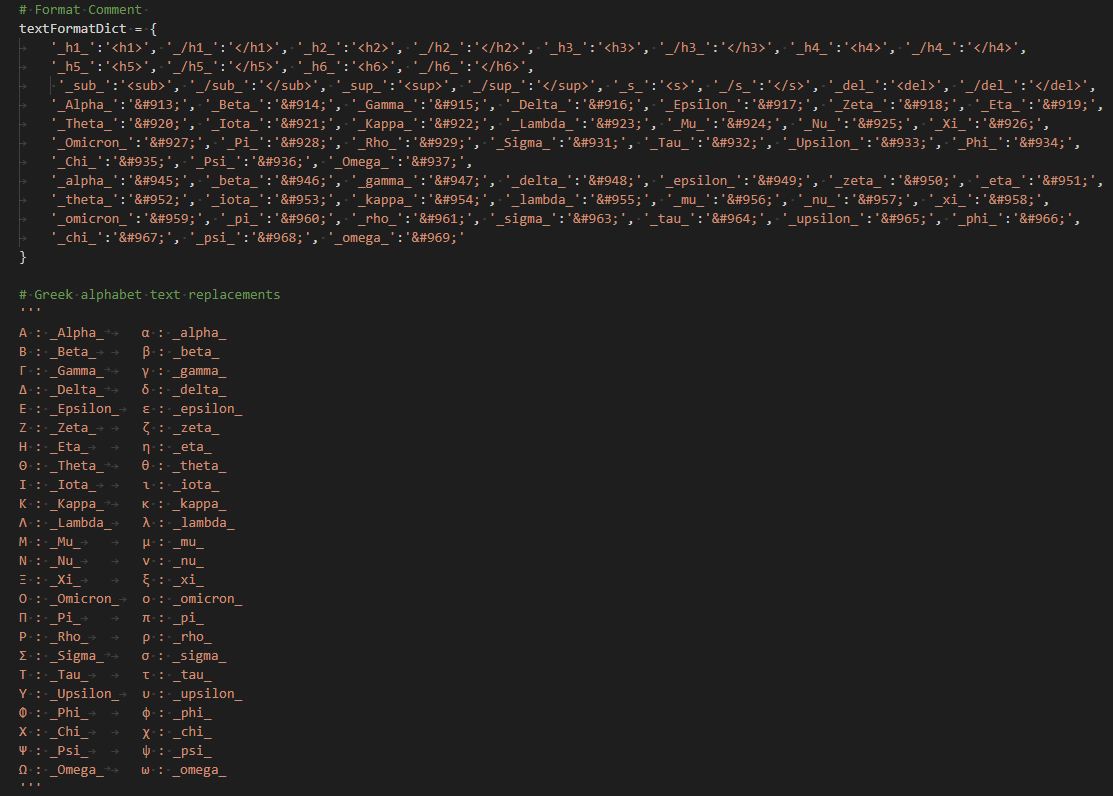
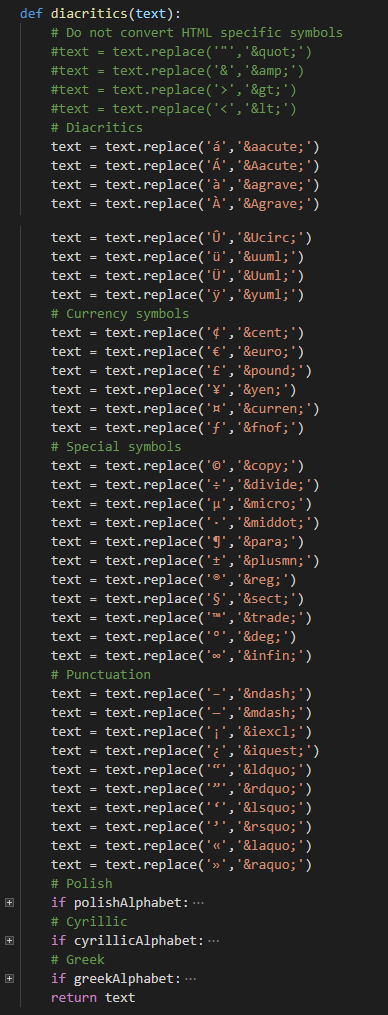
Diacritics
Regional characters and special symbols are managed by the dictionary “diacriticsDict” that converts the text to corresponding html symbol.
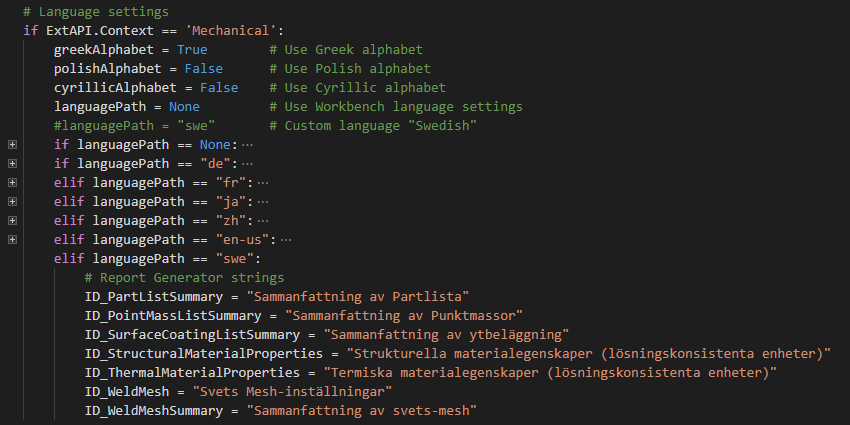
Language settings
The display language of Workbench is used if “languagePath = None”. The selected display language sets text language in the report automatically.
The Workbench language is defined in the “Tools>Options” window:

 ReportGenerator.dotm
The included Microsoft Word template uses VBA macros to execute the import and field conversion actions. When a new document is created the macro Document_New() is called.
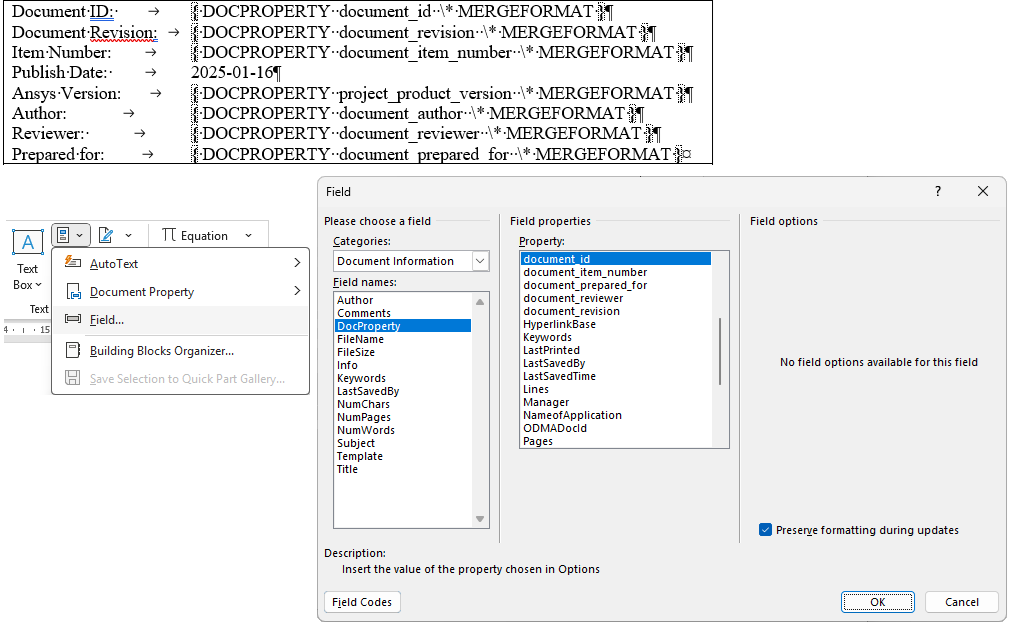
The Project Details in the Report Settings object defines the mapping of properties between Mechanical and the corresponding “Fields” in Word.
To see the current Fields press “Alt+F9” in Word. To input a Field use the “Insert>Field…” and select it from the list “Document Information/DocProperty”.
The project details and report name is imported from the file “reportGenerator.inp” that is created in the user %TEMP% folder when “Create Report” is clicked.
To speed up report creation the conversion of Figure/Table Captions to fields and applying paragraph style is done in a new way in the Document_New macro starting in the 2026 R1 release.
It is possible to manually select text and call the macros “TextToFields” and “TextToBookmarks” from the “View>Macros” menu in Word. Also updated in 2026 R1 release.
One other new feature is the conversion of regional characters in Project Details using the function HTMLDecode.
Macro - Document_New
Macro that is called when a new Word document is created from the Word template.
Update your customer template with the updates/modifications to make the new Table Caption Style and Figure Caption Style active.
The macro code can be copied by clicking in the upper right corner of the code block.
Private Sub Document_New()
    ' ----- Initiate variables ----------------------------------------------------------
    Dim myFile As String, textline As String
    Dim GraphicsWidth As Long, startPos As Long
    Dim posDoc As Integer
    Dim inpRng As Range, workRng As Range
    Dim bFound As Boolean
    Dim fso, str_tmppath
    Set fso = CreateObject("Scripting.FileSystemObject")
    str_tmppath = Environ("temp")
    myFile = fso.BuildPath(str_tmppath, "reportGenerator.inp")
    ' ----- Read input file with document properties ------------------------------------
    Open myFile For Input As #1
    Line Input #1, textline
    Line Input #1, textline
    UserFiles = Mid(textline, 18)
    Line Input #1, textline
    ReportName = HTMLDecode(Mid(textline, 18))
    Line Input #1, textline
    Title = HTMLDecode(Mid(textline, 18))
    Line Input #1, textline
    Subject = HTMLDecode(Mid(textline, 18))
    Line Input #1, textline
    DocumentID = HTMLDecode(Mid(textline, 18))
    Line Input #1, textline
    Revision = HTMLDecode(Mid(textline, 18))
    Line Input #1, textline
    ItemNumber = HTMLDecode(Mid(textline, 18))
    Line Input #1, textline
    LastSaved = Mid(textline, 18)
    Line Input #1, textline
    ProductVersion = Mid(textline, 18)
    Line Input #1, textline
    Author = HTMLDecode(Mid(textline, 18))
    Line Input #1, textline
    Reviewer = HTMLDecode(Mid(textline, 18))
    Line Input #1, textline
    PreparedFor = HTMLDecode(Mid(textline, 18))
    Line Input #1, textline
    TabCaptionTop = Mid(textline, 18)
    Line Input #1, textline
    TabCaptionName = Mid(textline, 18)
    Line Input #1, textline
    TabCaptionStyle = Mid(textline, 18)
    Line Input #1, textline
    FigCaptionName = Mid(textline, 18)
    Line Input #1, textline
    FigCaptionStyle = Mid(textline, 18)
    Line Input #1, textline
    GraphicsWidth = CLng(Mid(textline, 18))
    Line Input #1, textline
    ImageBorder = Mid(textline, 18)
    Close #1
    ' ----- Define html file name -------------------------------------------------------
    posDoc = InStr(ReportName, ".doc") - 1
    BaseName = Mid(ReportName, 1, posDoc)
    HtmlFile = BaseName + ".html"
    ' ----- Assign built in document properties -----------------------------------------
    ActiveDocument.BuiltInDocumentProperties(wdPropertyTitle) = Title
    ActiveDocument.BuiltInDocumentProperties(wdPropertySubject) = Subject
    ActiveDocument.BuiltInDocumentProperties(wdPropertyAuthor) = Author
    ' ----- Assign "CustomDocumentProperties" in the template ---------------------------
    ActiveDocument.CustomDocumentProperties("document_id").Value = DocumentID
    ActiveDocument.CustomDocumentProperties("document_revision").Value = Revision
    ActiveDocument.CustomDocumentProperties("document_item_number").Value = ItemNumber
    ActiveDocument.CustomDocumentProperties("project_product_version").Value = ProductVersion
    ActiveDocument.CustomDocumentProperties("project_last_saved").Value = LastSaved
    ActiveDocument.CustomDocumentProperties("document_author").Value = Author
    ActiveDocument.CustomDocumentProperties("document_reviewer").Value = Reviewer
    ActiveDocument.CustomDocumentProperties("document_prepared_for").Value = PreparedFor
    ' ----- Update "Title.png" image path on front page ---------------------------------
    For Each objField In ActiveDocument.Fields
      If Not objField.LinkFormat Is Nothing Then
        If objField.LinkFormat.Type = wdLinkTypePicture Then
            objField.LinkFormat.SourceFullName = UserFiles + "\" + BaseName + "_images\Title.png"
            objField.LinkFormat.Update
        End If
      End If
    Next objField
    '----- Import html report -----------------------------------------------------------
    ChangeFileOpenDirectory UserFiles
    startPos = ActiveDocument.Range.End
    Selection.EndKey Unit:=wdStory
    Selection.InsertFile FileName:=HtmlFile, Range:="", _
        ConfirmConversions:=False, Link:=False, Attachment:=False
    ' ----- Import appendix (if existing) -----------------------------------------------
    Open myFile For Input As #1
    Do Until EOF(1)
        Line Input #1, textline
        If InStr(1, textline, "Appendix:", vbTextCompare) > 0 Then
            AppendixName = Mid(textline, 11)
            Selection.EndKey Unit:=wdStory
            Selection.InsertFile FileName:=AppendixName, Range:="", _
                ConfirmConversions:=False, Link:=False, Attachment:=False
        End If
    Loop
    Close #1
    ' ----- Find Table captions and apply caption style ---------------------------------
    Set workRng = ActiveDocument.Range
    bFound = True
    Do While bFound
        workRng.Find.Execute FindText:=TabCaptionName, MatchCase:=True, MatchWholeWord:=True, Forward:=True
        bFound = workRng.Find.Found
        If Not bFound Then GoTo ContinueLoopTab
        workRng.Select
        If TabCaptionTop = "True" Then Selection.Paragraphs(1).KeepWithNext = True
        If TabCaptionStyle <> "None" Then Selection.Paragraphs(1).Style = TabCaptionStyle
        TextToFields
ContinueLoopTab:
        workRng.Collapse wdCollapsEnd
        workRng.End = ActiveDocument.Range.End
    Loop
    ' ----- Find Figure captions and apply caption style --------------------------------
    Set workRng = ActiveDocument.Range
    bFound = True
    Do While bFound
        workRng.Find.Execute FindText:=FigCaptionName, MatchCase:=True, MatchWholeWord:=True, Forward:=True
        bFound = workRng.Find.Found
        If Not bFound Then GoTo ContinueLoopFig
        workRng.Select
        If FigCaptionStyle <> "None" Then Selection.Paragraphs(1).Style = FigCaptionStyle
        TextToFields
ContinueLoopFig:
        workRng.Collapse wdCollapsEnd
        workRng.End = ActiveDocument.Range.End
    Loop
    ' ----- Update Figure width if needed -----------------------------------------------
    With ActiveDocument.Range
        For i = 1 To .InlineShapes.Count
            With .InlineShapes(i)
                If .Width > 10 Then
                    If .Width > GraphicsWidth Then
                        .LockAspectRatio = True
                        .Width = GraphicsWidth
                    End If
                    If i > 1 Then    'Ignore first Title image
                        If ImageBorder = "Yes" Then .Borders.Enable = True
                        .Select
                        Selection.Paragraphs(1).KeepWithNext = True
                    End If
                End If
            End With
        Next i
    End With
    ' ----- Remove background shading (optional) ----------------------------------------
    Selection.WholeStory
    With Selection.Font.Shading
        .Texture = wdTextureNone
        .ForegroundPatternColor = wdColorAutomatic
        .BackgroundPatternColor = wdColorAutomatic
    End With
    ' ----- Select text starting after TOC ----------------------------------------------
    Set workRng = ActiveDocument.Range
    workRng.Start = startPos - 1
    ' ----- Convert text to bookmarks ---------------------------------------------------
    workRng.Select
    TextToBookmarks
    ' ----- Convert text to fields ------------------------------------------------------
    workRng.Select
    TextToFields
    ' ----- Update all fields -----------------------------------------------------------
    ActiveDocument.Fields.Update
    ' ----- Set Cross-reference to Italic -----------------------------------------------
    For Each objField In ActiveDocument.Fields
        If objField.Type = wdFieldRef Then objField.Result.Font.Italic = True
    Next objField
    ' ----- Save document ---------------------------------------------------------------
    Selection.StartOf
    posDocx = InStr(ReportName, ".docx")
    If posDocx > 0 Then
        ActiveDocument.SaveAs2 FileName:=ReportName, FileFormat:=wdFormatXMLDocument
    Else
        ActiveDocument.SaveAs2 FileName:=ReportName, FileFormat:=wdFormatDocument
        Call breakLinks
        ActiveDocument.Save
    End If
End Sub
Macro - breakLinks
Macro that break existing links to images.
Sub breakLinks()
    For Each objField In ActiveDocument.Fields
        If Not objField.LinkFormat Is Nothing Then
            objField.LinkFormat.BreakLink
        End If
    Next
    ActiveDocument.UndoClear
End Sub
Macro - TextToFields
Macro that takes the current selection and converts all field text “{…}” to field objects.
Sub TextToFields()
    Dim inpRng As Range, workRng As Range
    Dim startPos As Long, endPos As Long
    Dim fieldText As String
    Dim bFound As Boolean
    Set inpRng = Selection.Range
    Set workRng = inpRng.Duplicate
    ' ----- Process all fields ----------------------------------------------------------
    bFound = True
    Do While bFound
        ' ----- Find first "{" ----------------------------------------------------------
        workRng.Find.Execute FindText:="{", Forward:=True, Wrap:=wdFindStop
        bFound = workRng.Find.Found
        If Not bFound Then Exit Do
        startPos = workRng.Start
        ' ----- Find matching "}" -------------------------------------------------------
        workRng.End = inpRng.End
        workRng.Find.Execute FindText:="}", Forward:=True, Wrap:=wdFindStop
        bFound = workRng.Find.Found
        If Not bFound Then Exit Do
        workRng.Start = startPos
        endPos = workRng.End
        ' ----- Get text string ---------------------------------------------------------
        fieldText = Trim(ActiveDocument.Range(startPos + 1, endPos - 1).Text)
        ' ----- Check if not nested fields ----------------------------------------------
        If InStr(fieldText, "{") = 0 Then
            ' ----- Update visible text -------------------------------------------------
            workRng.Characters.First.Delete 'remove the "{"
            workRng.Characters.Last.Delete 'and the "}"
            ' ----- Create field --------------------------------------------------------
            Set fld = ActiveDocument.Fields.Add(workRng, wdFieldEmpty, fieldText, False)
        End If
        workRng.Collapse wdCollapsEnd
        workRng.End = inpRng.End
        If InStr(workRng.Text, "{") = 0 Then Exit Do
        If workRng.Start = workRng.End Then Exit Do
    Loop
End Sub
Macro - TextToBookmarks
Macro that takes the current selection and converts all “[BookmarkText#IdBookmarkName#]” to bookmarks.
Sub TextToBookmarks()
    Dim inpRng As Range, workRng As Range, fieldRng As Range
    Dim startPos As Long, endPos As Long, IdPos As Long
    Dim bFound As Boolean
    Set inpRng = Selection.Range
    Set workRng = inpRng.Duplicate
    ' ----- Process all fields ----------------------------------------------------------
    bFound = True
    Do While bFound
        ' ----- Find bookmarkname -------------------------------------------------------
        With workRng.Find
            .ClearFormatting
            .Text = "#Id[A-Za-z0-9_]@#\]"
            .MatchWildcards = True
            .Wrap = wdFindStop
            .Forward = True
        End With
        workRng.Find.Execute
        bFound = workRng.Find.Found
        If Not bFound Then Exit Do
        workRng.Characters.First.Delete 'remove the "#"
        workRng.Characters.Last.Delete 'and the "]"
        workRng.Characters.Last.Delete 'and the "#"
        bookmarkName = Trim(workRng.Text)
        If Len(bookmarkName) > 40 Then bookmarkName = Mid(bookmarkName, 1, 40)
        IdPos = workRng.Start
        endPos = workRng.End
        ' ----- Find matching "[" and "]" -----------------------------------------------
        Set fieldRng = workRng.Duplicate
        fieldRng.Start = inpRng.Start
        fieldRng.Find.Execute FindText:="[", Forward:=False, Wrap:=wdFindStop
        bFound = fieldRng.Find.Found
        If Not bFound Then Exit Do
        startPos = fieldRng.Start
        fieldRng.End = endPos
        ' ----- Update visible text without bookmark name -------------------------------
        fieldRng.Text = ActiveDocument.Range(startPos + 1, IdPos).Text
        ' ----- Create bookmark safely --------------------------------------------------
        If ActiveDocument.Bookmarks.Exists(bookmarkName) Then ActiveDocument.Bookmarks(bookmarkName).Delete
        ActiveDocument.Bookmarks.Add Name:=bookmarkName, Range:=fieldRng
ContinueLoop:
        workRng.Collapse wdCollapsEnd
        workRng.End = inpRng.End
        bFound = InStr(workRng.Text, "#Id") > 0
        If workRng.Start = workRng.End Then Exit Do
    Loop
End Sub
Function - HTMLDecode
Function that converts a HTML text string to plain text.
Function HTMLDecode(sInput As String) As String
    Dim oHTMLFile As Object
    Set oHTMLFile = CreateObject("HTMLFile")
    oHTMLFile.Body.innerHTML = sInput
    HTMLDecode = oHTMLFile.Body.innerText
End Function
Workbench journaling (Legacy)
-
The report can be automatically exported from a selected analysis system by using Workbench journaling.
The Batch Report feature replaces the need for using journaling. -
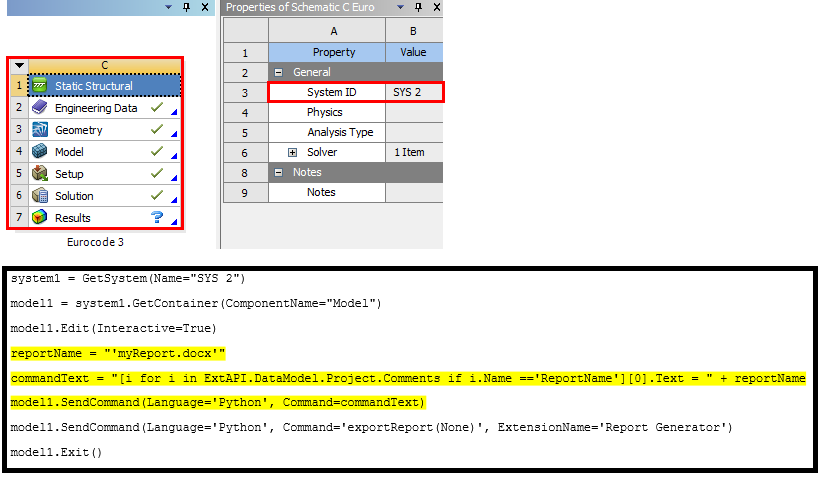
Identify the System ID (“SYS 2” in this case) and add the lines below to your script (myJournal.wbjn). You may edit the report name using the yellow lines (optional).
-
The journaling script may be used from the project page:
“File > Scripting > Run Script File…”
-
The journaling script can be added when running Workbench in batch from command prompt:
“C:\Program Files\ANSYS Inc\V222\Framework\bin\win64\runwb2” –X –R myJournal.wbjn
Mechanical must be able to open in interactive mode and Word must be installed on the PC if using the batch option.