Quick Reference Guide
Table of contents
 Report Settings
Add the Report Settings object to the model to select report template and document name as well as all content, style and figure settings for the current report. Settings can be imported from a selected previous app version. The settings can then be saved to update the app default values for each report template name.
 Initiate the report in the project
To start create a report click Default Comments to initiate the project with the needed default sections, e.g. “Introduction” and “Conclusions”, that are defined in the Report Settings.
Add content
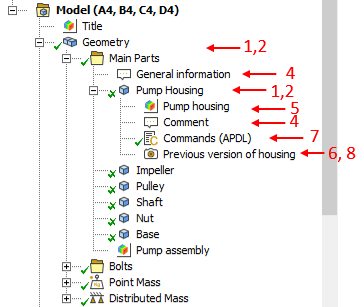
Report content is identified by the tag “Report”.
-
Select objects in the tree and click Tag Report Objects to include in the report.
The Cross-reference to the object is created in the “Clipboard” and can be pasted into any “Comment” object. -
Remove the “Report” tag by clicking the Un-Tag Report Objects.
-
Find all report objects by clicking the Filter Report Objects.
-
Insert and name text comments to add information about an object. There are powerful formatting features including reference to parameters and result identifiers as well as defining Bookmarks and reference to them with Cross-reference.
It is recommended to add comments as “text place holders” and then use the Edit Report Draft to do the actual typing and spell checking. After pasting formatted text to a comment the Erase Font Formatting is useful to clear font and size formatting. -
Insert and name the Figures. (Default name is “object name”) The name will be used as figure caption text in the report (and picture file name).
-
Use “New Static Images” to add Images to objects. If selecting “Figures” a static figure of each is created, e.g. to compare difference between an original and modified model or to export an individual image.
-
User Command Objects, UCO, “Commands (APDL)” will be included if tagged.
-
Insert “Figures from file” to add external images to the report.
Load Details
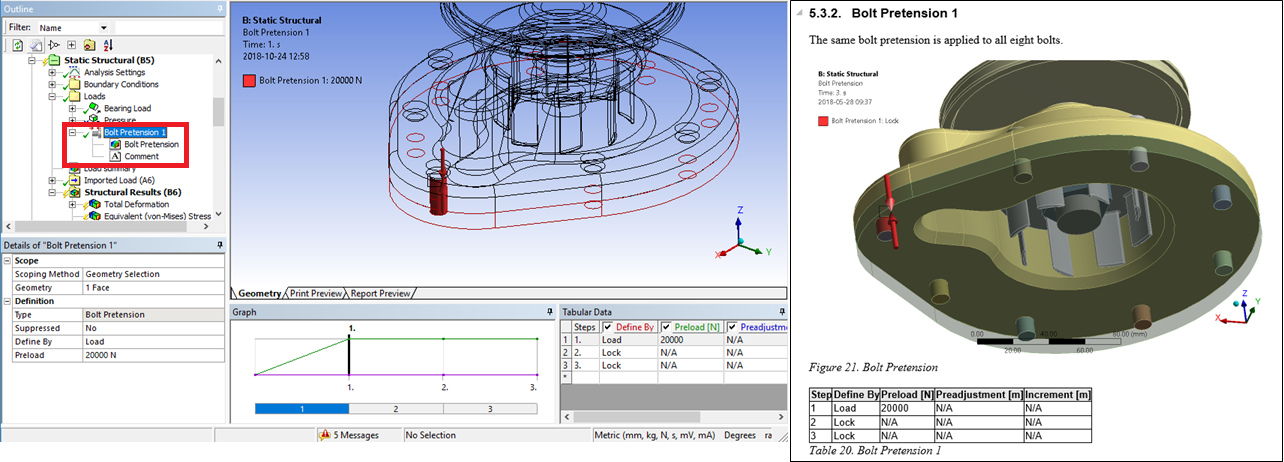
Tagging a load object will create a details summary table in the report after the comments and figures.
Result Details
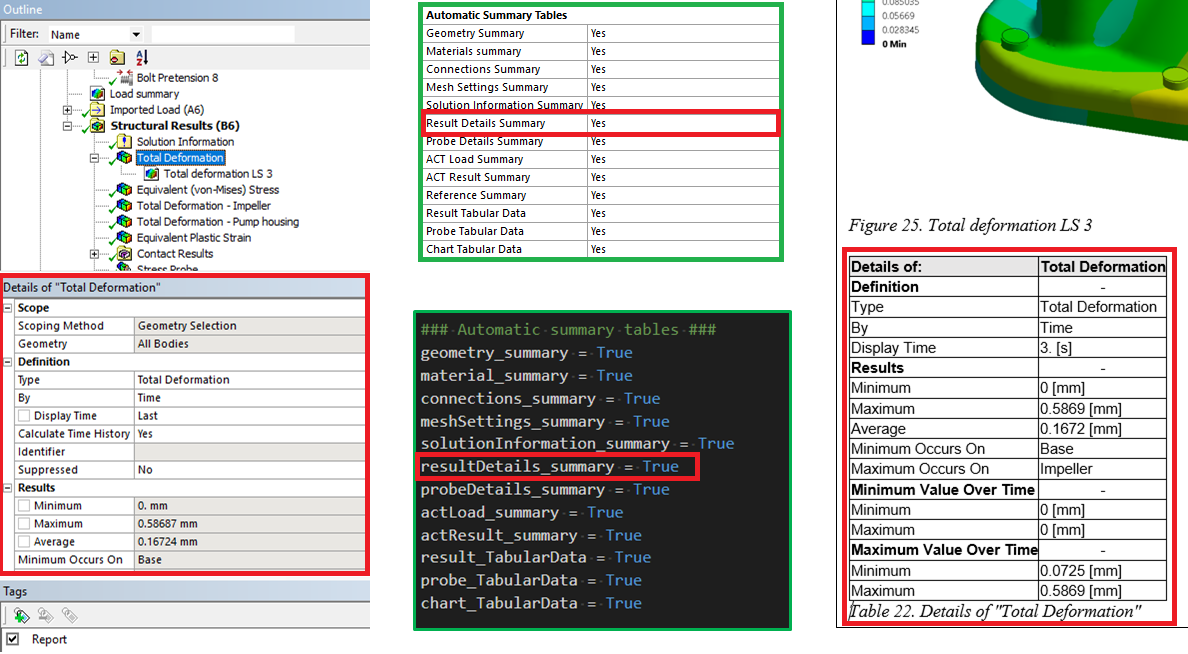
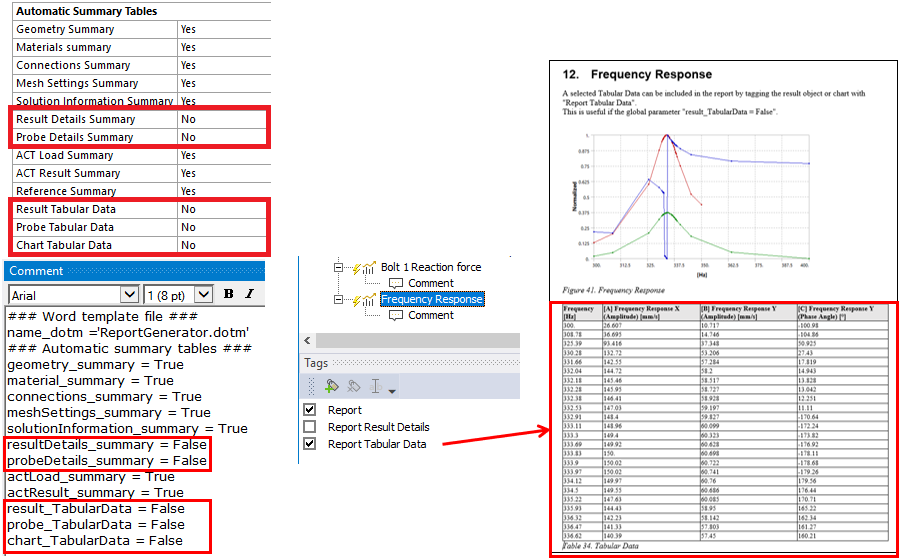
Tagging a result objects (contour, path and probe) will create a results summary table by default.
The automatic table can be included/excluded for the different types of objects by setting the corresponding property to Yes/No in the Report Settings or the parameter to True/False in the preference file.
Tabular Data
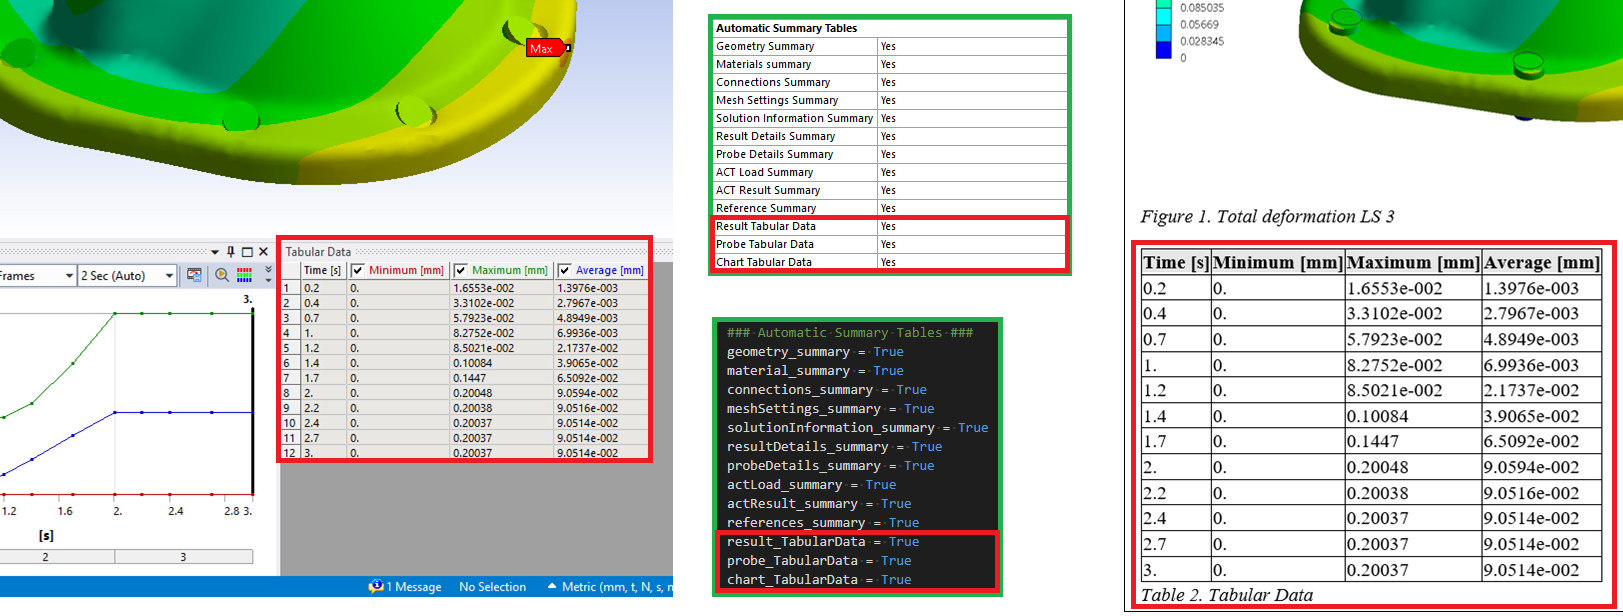
Tagging a result, probe or chart will create a Tabular Data table by default.
The automatic table can be included/excluded for the different types of objects by setting the corresponding property to Yes/No in the Report Settings or the parameter to True/False in the preference file.
Selected Result Details or Tabular Data
If the Result/Probe Details Summary or Tabular Data setting is “No” in the Report Settings to prevent the printout a selected result details or tabular data can still be exported by adding the tag “Report Result Details” or “Report Tabular Data” to the object.
Disposition
The report outline level for the main objects (Model, Geometry, Mesh, Analysis, Solution etc.) can be defined in the Report Layout Settings.
Grouping of objects may be used to define a disposition in the report with subheadings.
If the group is tagged a heading is created, if not tagged the group will just “sort” the objects.
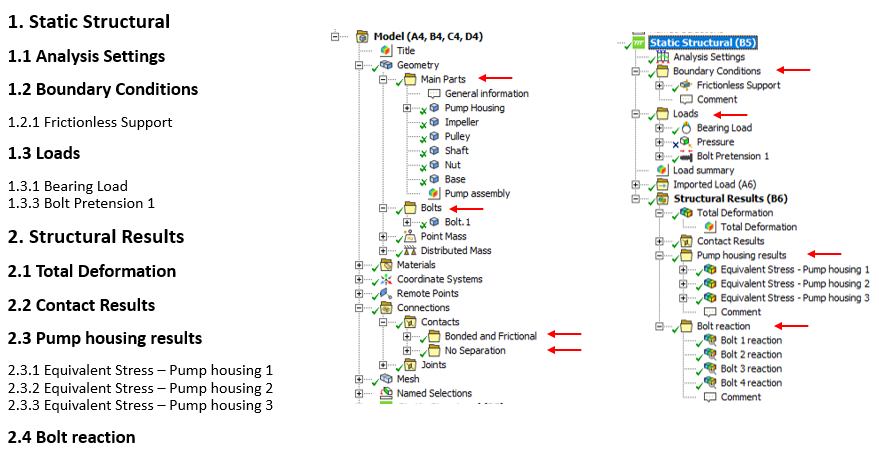
One or many groups may be used to re-order the objects in the report. If the group is not tagged the disposition level is not changed. Nestled groups (a group within another group) are not supported.
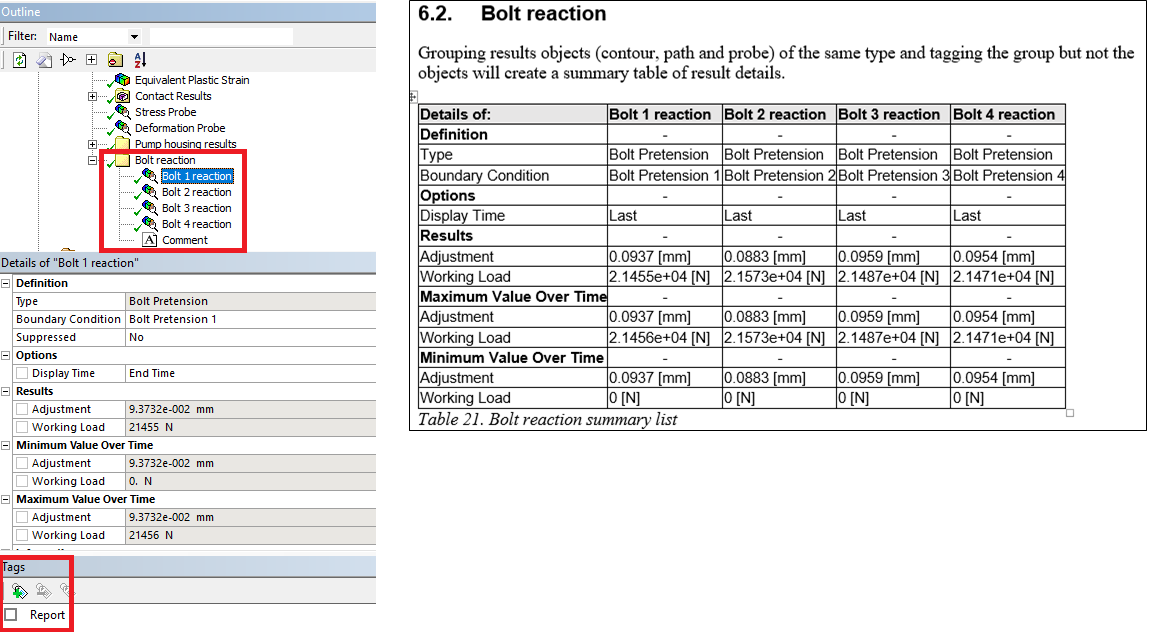
Grouped Results
Grouping result objects (contour, path and probe) of the same type and tagging the group object but not the result objects will create a results summary table of result details.
 Worksheet preview
Select an object in the model tree and click worksheet preview to display all details including the result summary tables. This feature ignores if the object is tagged with “Report” or not, but related Comments/Figures needs to be tagged. You may use it on the “Main” objects in the tree, e.g. “Geometry”, “Connections”, “Mesh”, “Loads” and “Results”.
 Html Menu
Use the Html Report to open a preview of the report in a web browser. There are dedicated “Bolt Report” and “Weld Report” templates for use with the “Bolt Toolkit” or “Weld Toolkit”.
 Edit Report Draft
Use the Edit Report Draft to open a html report draft in Microsoft Word and do additional editing and formatting. The default behavior when opening Word is changed in Report Settings to Independent Report Draft = Yes to prevent Mechanical to be locked while editing. Once Word is saved and closed the Mechanical model tree can be updated using Refresh Model From Draft to apply the changes in the html document.
 Refresh Model from Draft
Use the Refresh Model from Draft to sync changes from the current html report draft back to Mechanical. This is useful if the HTML file has been edited “off-line” in a different editor or with Mechanical being closed. Use the Erase Font Formatting to remove unwanted font and size formatting on selected or all Comments.
 Create Report
Use the Create Report to export and create the report as a Microsoft Word document using the selected Word template.
Changes done in the Word document (.docx/.doc) are not synced back to Mechanical.
 Update Figures in Word
Once the report is exported to Word you may Update Figures in Word if needed.
 Active License
The Active License button displays the status of the license. Click to release (check in) the license.