Getting Started
Table of contents
- Step 1 - Register to Rescale
- Step 2 - Install Fluent CloudConnect
- Step 3 - Load CloudConnect license file
- Step 4 - Set the Rescale API key in CloudConnect
- Step 5 - Create a Rescale job
- Step 6 - Configure Ansys license proxy settings
- Step 7 - Hardware settings
- Step 8 - Submit a job to Rescale
- Step 9 - Monitoring Rescale Job
- Optional
Step 1 - Register to Rescale
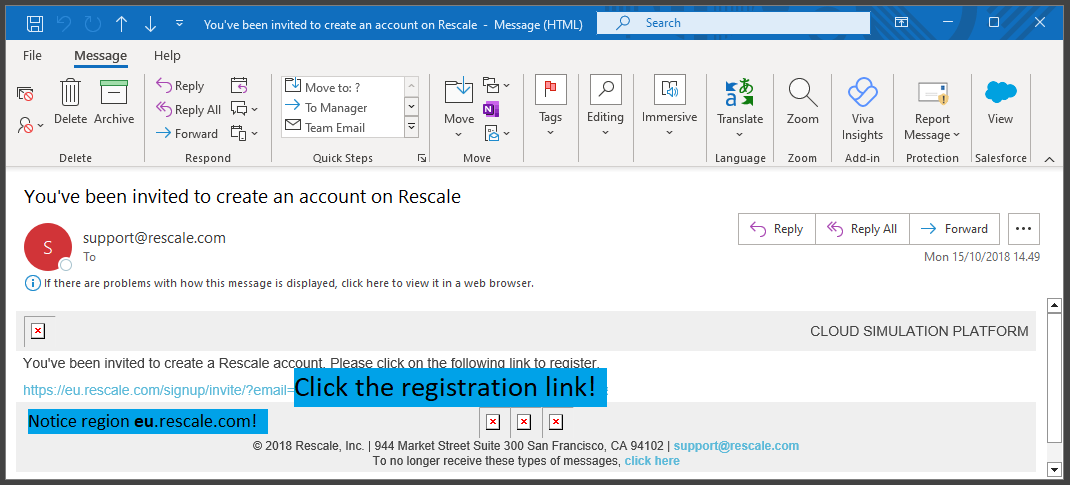
Ask your manager or IT to get invited to your company’s Rescale account. Continue the registration via the email link as illustrated in the image below.

How to invite new users as an admin to Rescale
Step 2 - Install Fluent CloudConnect
The installation files are not yet publicly distributed on the Internet. Please send an email to ansys@edrmedeso.com to get the installation files and let us know which Ansys Release you are using.
Fluent CloudConnect is a ribbon extension to the Fluent GUI. In order to enable the extension, either run the batch .bat file or the journal .jou file from the provided installation files. Installation files are provided as a compressed .zip file. Extract the contents to the desired install location.
Do not save extracted CloudConnect installation files to any directory with the space in its name. Spaces in the file path cause problems in use.
The extracted files must be available while using Fluent CloudConnect, do not edit or delete them after installation.
A - Batch file
In the extracted folder, double-click win_install_to_fluent.bat. A new ribbon item CloudConnect will be added to the next Fluent session. To uninstall, double-click win_remove_from_fluent.bat. The animation below shows how to install and uninstall Fluent CloudConnect using the batch files.
B - Journal file
In case you are unable to use the provided .bat files, the Fluent CloudConnect can be also installed/uninstalled through journal files. To install:
- Open ANSYS Fluent and from the File dropdown menu choose: File → Read → Journal
- Navigate to the extracted folder
- Choose
install_CloudConnect.jou - The app will be installed and the CloudConnect tab loaded to Ribbon
To uninstall, use the uninstall_CloudConnect.jou instead. Fluent needs to restart to remove the CloudConnect tab.
Step 3 - Load CloudConnect license file
To use Fluent CloudConnect, you must have a valid license key installed on your computer.
Your company’s license key is provided to you by EDRMedeso. To define the CloudConnect license key file, go to CloudConnect ribbon and navigate to Settings → CloudConnect License and select the file you received from EDRMedeso.
Step 4 - Set the Rescale API key in CloudConnect
CloudConnect authenticates the user to Rescale with an API key. The API key is a computer-generated personal secret that only you personally should know and thus Rescale can use it to verify your identity. It is different from your Rescale login credentials.
To obtain your API key you must login to your Rescale account and generate one from a menu under your user profile settings. Fluent CloudConnect reads the API key through the Connect to Rescale button in the CloudConnect toolbar. After the first time use, the API key is stored under your Windows user folder and remembered in the next sessions.
See the animation below for a step-by-step guide.
Step 5 - Create a Rescale job
After Rescale connection is verified with the API key, Create Rescale job task page will open. Alternatively, Create Rescale job task page can be opened by clicking Open Setup from the CloudConnect ribbon tab.
Now you can specify the job name and project if needed. Some companies wish to track cloud consumption on a project level. This is possible by assigning the job to a project.
Setup and solutions must be defined before submitting the job. CloudConnect reads your current case.
Step 6 - Configure Ansys license proxy settings
License Options defines which ANSYS license is used in Rescale to run the simulation.
When using floating licenses, the ANSYS license proxy used by your company with Rescale must be defined. This license configuration may differ from the one used on your local machine. To find the proxy configs your company use, login to your Rescale account on web browser and copy the settings as shown below.
Your job will wait in a queue in Rescale until licenses become available. You can choose the HPC license type or let CloudConnect automatically detect which licenses are available in your license pool.
Step 7 - Hardware settings
Below license options you can specify the core type, number of cores and maximum walltime for the Rescale job.
Core types are shown as a dropdown list, with On-Demand-Priority price listed next to them. Allowed core types can be selected from the Settings (Shown in the animation below). Please note that not all core types are fit for CFD purposes. The Coretype Info Dropdown facilitates hardware property investigation.
On default, the core type can be chosen from the four options recommended for CFD-related jobs:
- Amber v2 (large cases, minimum core count 120)
- Hematite (large cases, minimum core count 64)
- Luna (medium cases, minimum core count 24)
- Emerald (small cases, minimum core count 1)
Aim for a mesh-cores ratio of 30 000 – 50 000 cells/core for optimal parallelization in most cases.
The number of cores to be used in Rescale is set in the Cores spinbox. The value will be updated to match the settings for the specific core type.
Maximum walltime refers to maximum solution time. Rescale solution will be stopped without saving current data when the time is reached.
The GPU count is also visible. It is editable when the Fluent native GPU solver is selected.
Step 8 - Submit a job to Rescale
Pressing Preview and Calculate will show a panel with a quick summary of Rescale job settings, initialization method and running parameters. Additionally, you can do a draft job to Rescale and enable SSH and Fluent Remote Visualization Client.
A good practice is to verify the time advancement settings from the Run Calculation task page, as only some of them are shown in the summary. The solution will be solved according to the specified iteration/time step settings shown on the Run Calculation page. Additionally, the reference frame and initial values should be verified from the Solution Initialization task page.
Pressing Submit Job will start the batch job process. Fluent will display a small pop-up window, which gets updated when tasks are completed.
While the files are uploading to Rescale python terminal window will appear. Uploading can be stopped by closing the terminal.
Step 9 - Monitoring Rescale Job
Monitoring and downloading Rescale jobs can be done from the Monitor Job task page, which can be opened by clicking Monitor Job from the ribbon menu. To get a list of all the jobs related to your account, click Get Jobs from Rescale. Pressing Get Selected Job will choose the currently selected job from the dropdown menu.
You can check job status, plot residuals and reports, read selected case and data files and download files related to the selected job. Additionally, if the SSH and Fluent Remote Visualization clients were enabled during the job submissions you can utilize the SSH connection when the job is running.
If the job is currently running you might need to update the file list to get the files needed.
Optional
Utilize Rescale Command Line Interface (CLI)
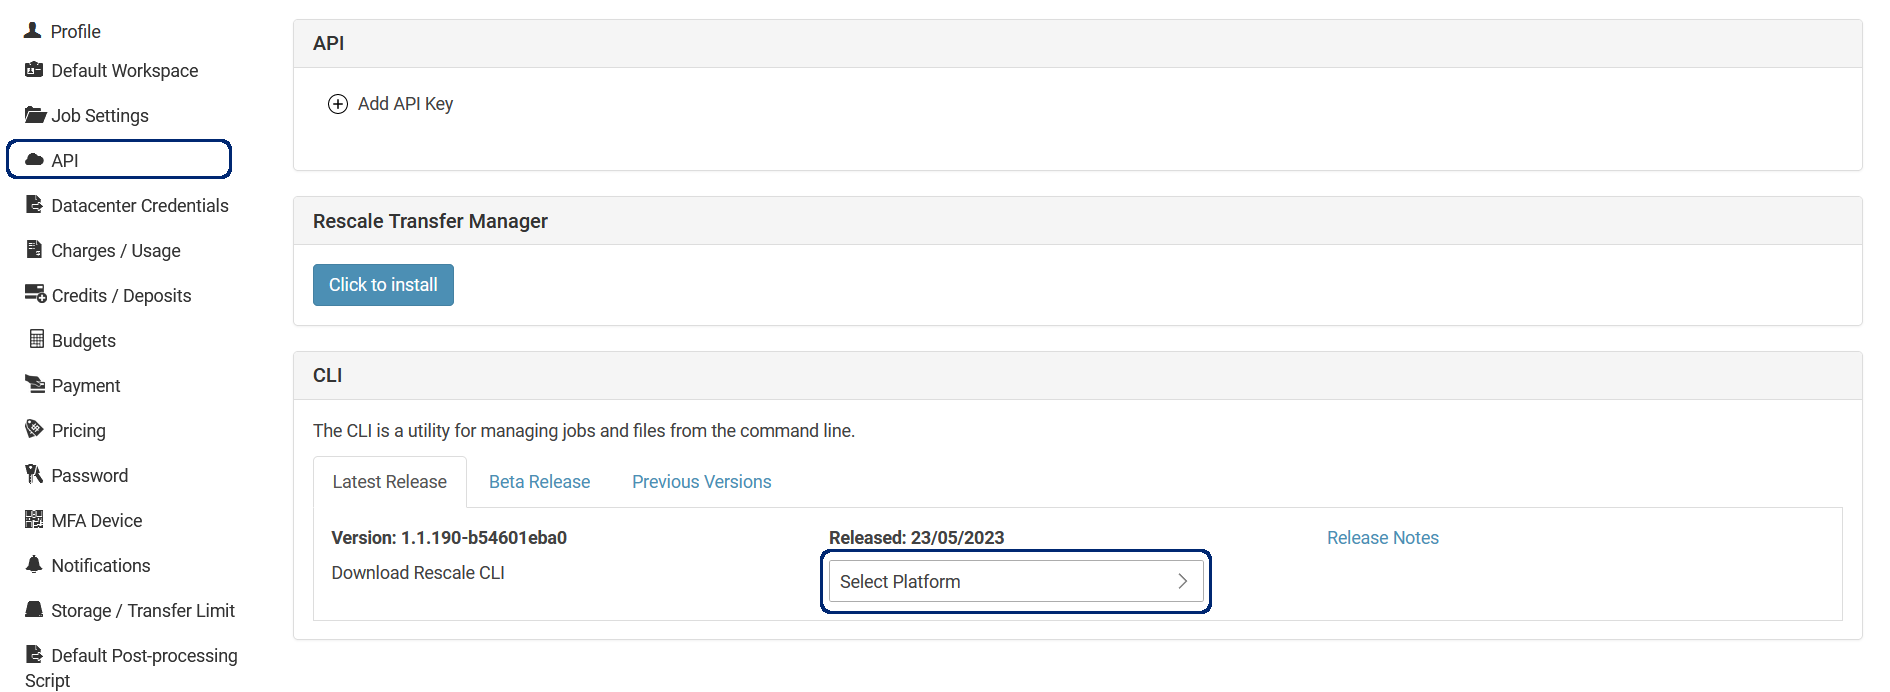
Alternatively, files can be uploaded to Rescale with Rescale Command Line Interface (CLI). Fluent CloudConnect automatically utilizes Rescale CLI’s multi-threaded transfer library for uploading files if the CLI is installed. It is free to use and can be installed from your Rescale user profile settings.

How to invite new members to Rescale as an admin
If you’re an admin to your company’s Rescale account, you might be asked to invite new members to the platform. This can be done easily from the web browser.